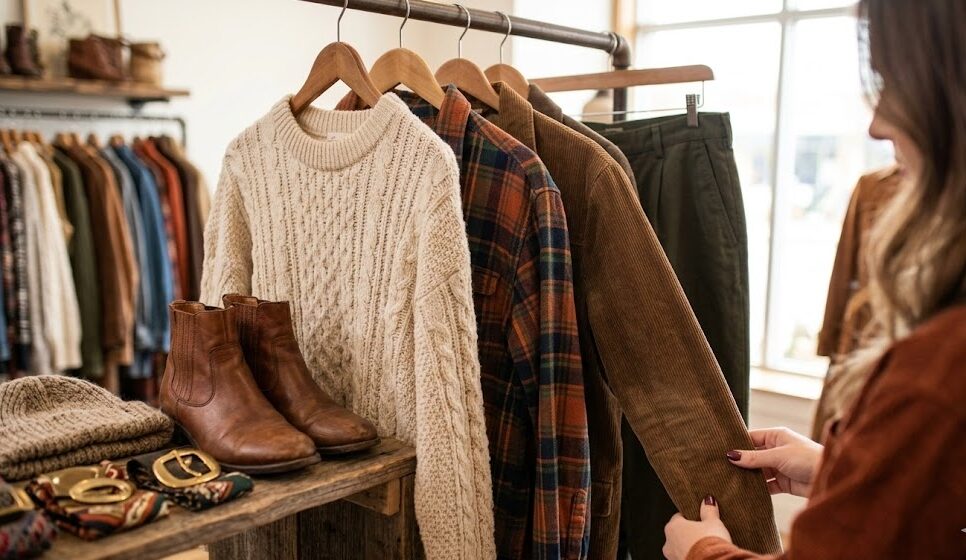
Upcycling thrift store finds is a fun and eco-friendly way to breathe new life into old items. This guide covers six simple projects you can try today, from transforming old furniture to crafting denim quilts. Here’s a quick summary of what you’ll learn:
- Furniture Makeovers: Sand, paint, and refinish thrifted furniture for a fresh look.
- DIY Tank Tops: Turn oversized t-shirts into custom summer wear.
- Denim Quilts: Repurpose old jeans into cozy, durable blankets.
- Jar Light Fixtures: Create stylish lighting from mason jars.
- Picture Frame Updates: Revamp outdated frames with paint and decorative touches.
- Fabric Wall Art: Use thrifted textiles to craft unique wall decor.
Whether you’re a beginner or an experienced DIYer, these projects are budget-friendly and great for reducing waste. Start small with basic tools, and let your creativity guide you!
Project 1: Update Old Furniture
Give old furniture a fresh life with the right tools and a little creativity. This project focuses on transforming thrifted pieces into stylish decor by following basic upcycling techniques.
Supply List
| Category | Essential Items | Estimated Cost |
|---|---|---|
| Power Tools | DeWalt 5″ Random Orbital Sander, Cordless Drill | $65–$99 |
| Paint Tools | Paint Sprayer, Zibra Brush Kit, Foam Rollers | $109–$145 |
| Safety Gear | Respirator Mask, Safety Glasses, Work Gloves | $15–$25 |
| Materials | Sandpaper (80/150/220 grit), Wood Filler, Primer | $30–$45 |
| Finishing | General Finishes High Performance Top Coat, Hardware, Clamps | $75–$90 |
Furniture Makeover Steps
- Preparation and Cleaning Start by inspecting your furniture for any structural issues. Once it’s ready, clean the surface thoroughly with a solution made from 4 cups of warm water, ½ cup vinegar, ½ teaspoon dish soap, and 10 drops of lemon essential oil. Let it dry completely before moving on.
- Surface Preparation: Remove any hardware from the furniture. Sand the surface in stages, starting with 80-grit sandpaper, then moving to 150-grit, and finishing with 220-grit for a smooth finish. Use wood filler to repair any holes or damaged areas.
- Priming and Painting Apply a coat of Zinsser Bullseye 123 Primer ($14 per quart) to ensure the paint adheres well. Once the primer is dry, apply thin and even coats of paint. If you’re working on intricate designs or large surfaces, a Wagner Flexio 590 paint sprayer ($145) can help achieve a professional finish.
- Finishing Touches: Protect your work with General Finishes High Performance Top Coat ($45 per quart). Use a foam brush to apply the top coat evenly, smoothing out any bubbles. Allow the piece to cure for 24 hours before reattaching hardware.
Tips for Distressed Finishes
If you’re aiming for a distressed, vintage look, focus on high-wear areas like edges and corners. Lightly sand these spots with 220-grit sandpaper after the paint has dried to create a natural, aged effect.
For inspiration, check out Thirty Eighth Street’s makeover of thrifted nightstands. They used a custom gray paint mixture from Pure & Original, followed by wet distressing and sealing. The entire project took just three days and delivered stunning results.
For minor scratches on wood furniture, try Howard’s Feed & Wax. As Drew Michael Scott from Lone Fox shares:
“I love Howard’s Feed & Wax, which is a beeswax and orange oil furniture polish that makes wood pieces look brand-new. It makes scratches in wood furniture almost disappear. I can’t recommend it enough”.
Project 2: Make Tank Tops from Large Shirts
Turn oversized t-shirts into trendy tank tops with just a few basic sewing skills and minimal tools. This project is a great way to upcycle thrifted shirts into personalized summer wear that fits perfectly.
Tools and Materials
| Category | Must-Have Items | Nice-to-Have Items |
|---|---|---|
| Base Materials | Large t-shirt, Tank top (as a pattern) | Knit binding strips |
| Cutting Tools | Fabric scissors | Chalk pen or erasable marker |
| Sewing Supplies | Straight pins, Iron | Sewing machine, Matching thread |
| Safety Items | Ironing board, Measuring tape | Interfacing for labels |
Once you’ve gathered everything, follow these simple steps to create your tank top:
Tank Top Instructions
- Preparation
Start by washing and ironing both the t-shirt and the tank top you’ll use as a pattern. Turn the t-shirt inside out and lay it flat on a clean surface. - Measuring and Cutting
Place your tank top on the t-shirt, aligning the shoulders perfectly. Pin the two garments together to keep them in place. Cut along the tank top’s outline, leaving about a ½-inch seam allowance for sewing. - Edge Finishing
Fold the edges inward by ½ inch and secure them with pins. Use an iron to press the folds, adjusting the heat to suit your fabric. Sew along the folds with a ¼-inch seam. If your t-shirt is made of jersey fabric, you can skip hemming since it won’t fray.
Pattern Combination Ideas
Upcycling gives you the chance to get creative, and visible mending is a great way to combine practicality with style:
“Visible mending is not only a practical way of fixing clothes up but also gives them a brand-new look. It’s a super easy way to add some character and personality to your kid’s clothes (and adults’ clothes too if you have a small hole!)”
Here are some fun ways to customize your tank top:
- Add decorative pockets using fabric that contrasts or complements the t-shirt.
- Use fabric glue to attach embellishments like patches or appliqués.
- Paint custom designs with stencils and fabric paint.
- Experiment with tie-dye techniques for a vibrant, summer-ready vibe.
For the best results, pick t-shirts with a bit of stretch. Stretchy fabrics are easier to work with and more forgiving during the sewing process.
Project 3: Make a Denim Quilt
Turn your old jeans into a sturdy and versatile quilt that’s perfect for picnics, camping trips, or just snuggling up on chilly nights. Not only does this project breathe new life into worn denim, but it also aligns with the eco-conscious values championed by Red Racks Thrift Stores.
Required Materials
| Category | Essential Items | Optional Items |
|---|---|---|
| Base Materials | Old jeans in mixed washes | Flannel sheet for backing |
| Tools | Sewing machine, denim needle, rotary cutter | Walking foot attachment |
| Measuring | Large ruler or quilting square, measuring tape | Cardboard template |
| Notions | Heavy-duty thread, straight pins | Lightweight stabilizer |
| Finishing | Scissors, iron | Seam ripper |
Quilt Assembly Steps
- Prepare Your Denim Start by removing pockets, waistbands, and zippers using a seam ripper. Cut along the center seams and trim away any overly stretched areas, such as the knees, to ensure your fabric is even and usable.
- Cut Your Squares Use a rotary cutter and ruler to cut the denim into 8×8-inch squares. For a queen-size quilt, you’ll need around 132 squares. Once cut, iron each square to create a smooth, flat surface.
- Arrange the Pattern: Lay out your squares on the floor, alternating different denim washes to create a visually appealing design. Take a photo of your layout to use as a reference during assembly. As Autumn from ItsAlwaysAutumn.com explains:
“Every one needs a denim quilt! They’re perfect for keeping in the back of the car so you always have a blanket handy for park playdates, picnics, soccer games, etc.”
- Assemble the Quilt Sew the squares into rows using a ½-inch seam allowance, pressing the seams open as you go. Once the rows are complete, connect them, carefully aligning the seams. A walking foot attachment can be a lifesaver here, helping your machine handle the thick denim layers with ease.
These steps will guide you in creating a quilt that’s both functional and stylish – a great addition to a sustainable lifestyle.
Working with Different Denims
To balance the quilt’s weight, place heavier denim pieces in the center and use a lightweight stabilizer for stretchier fabrics. Pressing seams open will help reduce bulk and make the quilt easier to handle.
Adding Visual Flair
- Alternate light and dark denim squares for a checkerboard look.
- Arrange similar shades for a gradient or ombré effect.
- Use pockets or other denim details as decorative accents.
“If you are new to sewing – this is a fabulous project. It’s affordable – just old jeans! And it’s easy – straight lines that don’t need to be perfect.” – Robin, FrugalFamilyTimes.com
For a cozy, rustic finish, consider the frayed edge technique. Sew the squares with the wrong sides together, then wash the quilt several times to encourage natural fraying. Over time, this will create a soft, worn-in look that only gets better with use.
Project 4: Make Jar Light Fixtures
Let’s keep the upcycling fun going by turning ordinary jars into stylish light fixtures that can brighten up your home.
Materials Needed
| Category | Essential Items | Optional Items |
|---|---|---|
| Jars | Mason jars (8 oz to 2-gallon sizes) | Vintage decorative jars |
| Lighting | Pendant light kit, LED bulbs | Edison-style bulbs |
| Tools | Drill with a diamond bit, wire cutters, and pliers | Tin snips |
| Safety | Electrical tape, wire | Modeling clay, super glue |
| Hardware | Ceiling hooks, lamp kit adapter | Decorative chain |
Light Assembly Guide
Here’s how to safely transform jars into functional light fixtures:
- Prepare the Jar
Start by thoroughly cleaning and drying the jar. Remove any labels or sticky residue for a polished look. - Modify the Lid
Use a drill with a diamond bit to create a hole in the center of the jar lid. Add a few smaller ventilation holes around it to prevent overheating.“Please note, we are not licensed electricians. If you aren’t comfortable with this, get some help.” – gabbyguru
- Install the Light Kit
Feed the pendant light kit through the drilled hole, secure it with the necessary hardware, and wrap any exposed wires with electrical tape. For a safe and energy-efficient option, stick with LED bulbs – they stay cool and last longer.
Display Arrangement Tips
Kitchen Lighting
- Hang one jar light above your sink for focused lighting.
- Create a cluster of three jars at varying heights for a chic, layered effect.
- Use flush mounts if you’re working with low ceilings.
Living Spaces
Position jar lights strategically to enhance your room’s aesthetic while providing enough light for the space. They work great as accent pieces or even as conversation starters.
Outdoor Applications
For outdoor use, make sure to use wet-rated components and weatherproof seals. These lights can beautifully illuminate pathways, patios, or porches while standing up to the elements. Just ensure the wiring is suitable for outdoor conditions.
Project 5: Update Picture Frames
Let’s keep the upcycling momentum going! Breathing new life into old picture frames is easier than you might think. With a few simple techniques and tools, you can turn outdated frames into eye-catching home decor pieces.
Frame Update Supplies
Here’s what you’ll need to get started:
| Category | Essential Items | Optional Items |
|---|---|---|
| Cleaning | Hot soapy water, towel, letter opener/flat screwdriver | White Lightning cleaner |
| Prep Tools | Sandpaper, primer | X-Acto knife, cutting mat |
| Paint | Chalk-based paint, spray paint | Metallic paint, gilding wax |
| Finishing | Clear coat sealer, wax | Mod Podge, craft glue |
| Decorative | Paint brushes, sponge brushes | Wood appliques, decorative transfers |
Frame Makeover Steps
- Preparation Phase: Start by taking the frame apart – remove the glass, backing, and any hardware. Wash the glass with warm, soapy water to ensure it’s clean and streak-free. If your frame is wooden, give it a quick sanding to smooth out any rough areas.
- Base Coating Choose your paint – chalk-based or spray paint work beautifully – and apply thin, even coats. Make sure to do this outdoors or in a well-ventilated area. For a sophisticated, vintage vibe, Martha Stewart Living suggests using metallic spray paint.
- Adding Dimension: Elevate your frame’s look with these creative techniques:
- Mix metallic paint with chalk paint for a color wash effect.
- Use dry brushing with a lighter shade to accentuate intricate details.
- Add decorative moldings or wood appliques to plain frames.
- Apply gilding wax to create striking metallic highlights.
These small additions can completely transform your frame into a standout piece.
Color Selection Guide
For a timeless look, try a chalk-based ‘French Linen’ base coat paired with metallic ‘Steel Magnolia’ accents. This combination, recommended by AJ’s Vintage Designs, adds a touch of elegance to any frame.
“Before you paint, always clean your surface with a TSB-based cleaner to make sure the paint properly adheres.” – AJ’s Vintage Designs
Finishing Touches
Once you’re happy with your colors, seal the deal with a protective finish:
- Use clear wax for a soft, polished look.
- Try Best Dang Wax in Brown for a warm, antique feel.
- Easy-Peasy Spray Wax is perfect for quick and effective protection.
For inspiration, check out In My Own Style’s budget-friendly makeover. They transformed thrift store frames using faux stone and vintage tin adhesive tile sheets – all for just $2.50, thanks to leftover supplies.
With your updated frame proudly displayed, you’re well on your way to becoming a pro at turning old into new!
Project 6: Make Fabric Wall Art
Dive into the world of upcycling by turning thrifted fabrics into stunning wall art. This project not only gives secondhand textiles a fresh purpose but also brings texture and charm to your space.
Project Materials
| Essential Items | Optional Decorative Elements |
|---|---|
| Thrifted fabrics (velvet, linen, burlap) | Metallic threads |
| 1/4″ plywood backing | Embroidery supplies |
| Picture frames | Beads and tassels |
| Heavy-duty stapler and staples | Decorative trim |
| Scissors | Appliqués |
| Iron and ironing board | Shadow box frames |
Wall Art Assembly
Step 1: Prepare Your Materials
Start by washing and ironing your thrifted fabrics to remove any creases. Cut the plywood to match the size of your chosen frame – its lightweight yet sturdy nature makes it perfect for this project.
Step 2: Mount the Fabric
Lay the fabric face down on a clean, flat surface. Place the plywood on top, ensuring the fabric covers the edges. Pull the material taut and staple it securely along all sides, folding the corners neatly for a polished look.
Step 3: Frame Assembly
Carefully place the mounted fabric into your frame or shadow box, ensuring a smooth and flush finish.
“The best décor expresses personality and place” – Nicholas Kaiko
Decorative Elements
Take your wall art to the next level by playing with textures, patterns, and layers:
- Apply the 60-30-10 rule for pattern combinations:
- 60% as the dominant pattern (e.g., a bold floral print)
- 30% as a secondary design (like geometric shapes)
- 10% as an accent (such as a small-scale print)
- Position your artwork in natural light to highlight its textures.
- Experiment with layering sheer fabrics behind patterned ones, adding metallic thread for shimmer, or incorporating vintage appliqués. Mixing materials like smooth velvet with rough burlap can create striking contrasts.
Throughout the process, check that the fabric stays smooth and patterns remain aligned. The goal is a flat, professional-looking finish without any sagging or warping.
A great example of this technique is a recent project where floral linen was stretched over plywood and framed. The result? A sophisticated piece of art, achieved by carefully aligning the pattern and maintaining even tension during assembly.
Once you’ve completed this project, there’s no limit to how far your upcycling creativity can take you!
Start Your First Project
Dive into upcycling by picking a project that turns your thrifted treasures into something both functional and eye-catching. Choose something that matches your skill level and the tools you have on hand. Beginners might enjoy simple projects like revamping a picture frame or crafting a jar light fixture, while seasoned DIYers can take on more ambitious tasks like furniture restoration or sewing a denim quilt.
Here’s a quick guide to help you plan your first project:
| Project Selection Criteria | Things to Keep in Mind |
|---|---|
| Time Commitment | 2–3 hours for beginners, 1–2 days for intermediate, 3+ days for advanced projects |
| Tools Needed | Basic: scissors, glue, paintbrushes Advanced: power tools, sewing machine |
| Skill Level | Start with manageable tasks and build your confidence |
| Workspace | From a simple tabletop to a garage-sized area, depending on your project |
Set up a workspace that’s well-lit and organized – having everything in place can make the process smoother. Keep inspiration handy, like photos or fabric swatches, to guide your creative journey.
Feeling overwhelmed? Break your project into smaller steps. For instance, if you’re working on fabric wall art, try starting with one small frame before moving on to a larger gallery wall.
FAQs
How can I pick the best thrift store items for upcycling projects?
When you’re selecting thrift store finds for upcycling, start by evaluating the quality of the materials. Opt for durable items like solid wood furniture, metal objects, or fabrics that feel well-made. Steer clear of pieces with significant damage, like deep stains, large tears, or overpowering odors – they can be tough to work with and might complicate your project.
Then, trust your creative instincts. Choose items that catch your eye or inspire an idea – maybe it’s a quirky chair, a retro jacket, or even a simple glass jar. If you’re just starting out, begin with smaller, easier projects like picture frames or vases to get the hang of it and build your confidence.
The trick is to focus on potential rather than perfection. With a bit of imagination, even the most unexpected thrift store treasures can be transformed into something extraordinary!
What steps can I take to make my upcycled furniture sturdy and long-lasting?
To make upcycled furniture that lasts, start by selecting pieces with sturdy construction, like those made from hardwood. Check for problems such as cracks, loose joints, or rot, and steer clear of anything with serious structural issues. Preparation is crucial: thoroughly clean the furniture, fix any damage using wood filler, and sand the surfaces to help paint or finishes stick effectively.
Once prepped, apply a high-quality primer and choose paints or finishes specifically made for furniture. For added protection, especially on pieces that will see heavy use or face moisture, finish with a clear, durable topcoat. Be sure to let each coat dry completely before applying the next. By following these steps, your upcycled furniture will not only look fantastic but also hold up for years to come!
What should I avoid when upcycling thrifted clothing into new outfits?
When working on upcycling thrifted clothing, there are a few pitfalls to avoid. First and foremost, always wash and prepare your items before getting started. Skipping this step can cause unexpected issues, like dealing with unclean fabrics or difficulty handling the material during your project.
Another key step is to plan your design ahead of time. Rushing in without a clear vision can leave you feeling stuck midway or dissatisfied with the outcome. Take a moment to sketch out your ideas or think through how you want the final piece to look.
Pay attention to fabric selection, ensuring that the colors and textures work well together. This helps create a balanced and stylish result. If you’re a beginner, stick to simpler projects at first. This approach helps you build confidence and skills without feeling overwhelmed.
Lastly, using the appropriate tools and techniques for your chosen fabric and design is essential. The right equipment can make all the difference in achieving a polished, long-lasting piece you’ll be proud to wear.